Finally, painting is completed. Now cut and buff with some touch up. The doors go back on tomorrow.
August 3, 2012


July 26, 2012
engine bay painted
The engine bay is now painted and I can start to put things back together in there. (sorry for the cellphone pics)


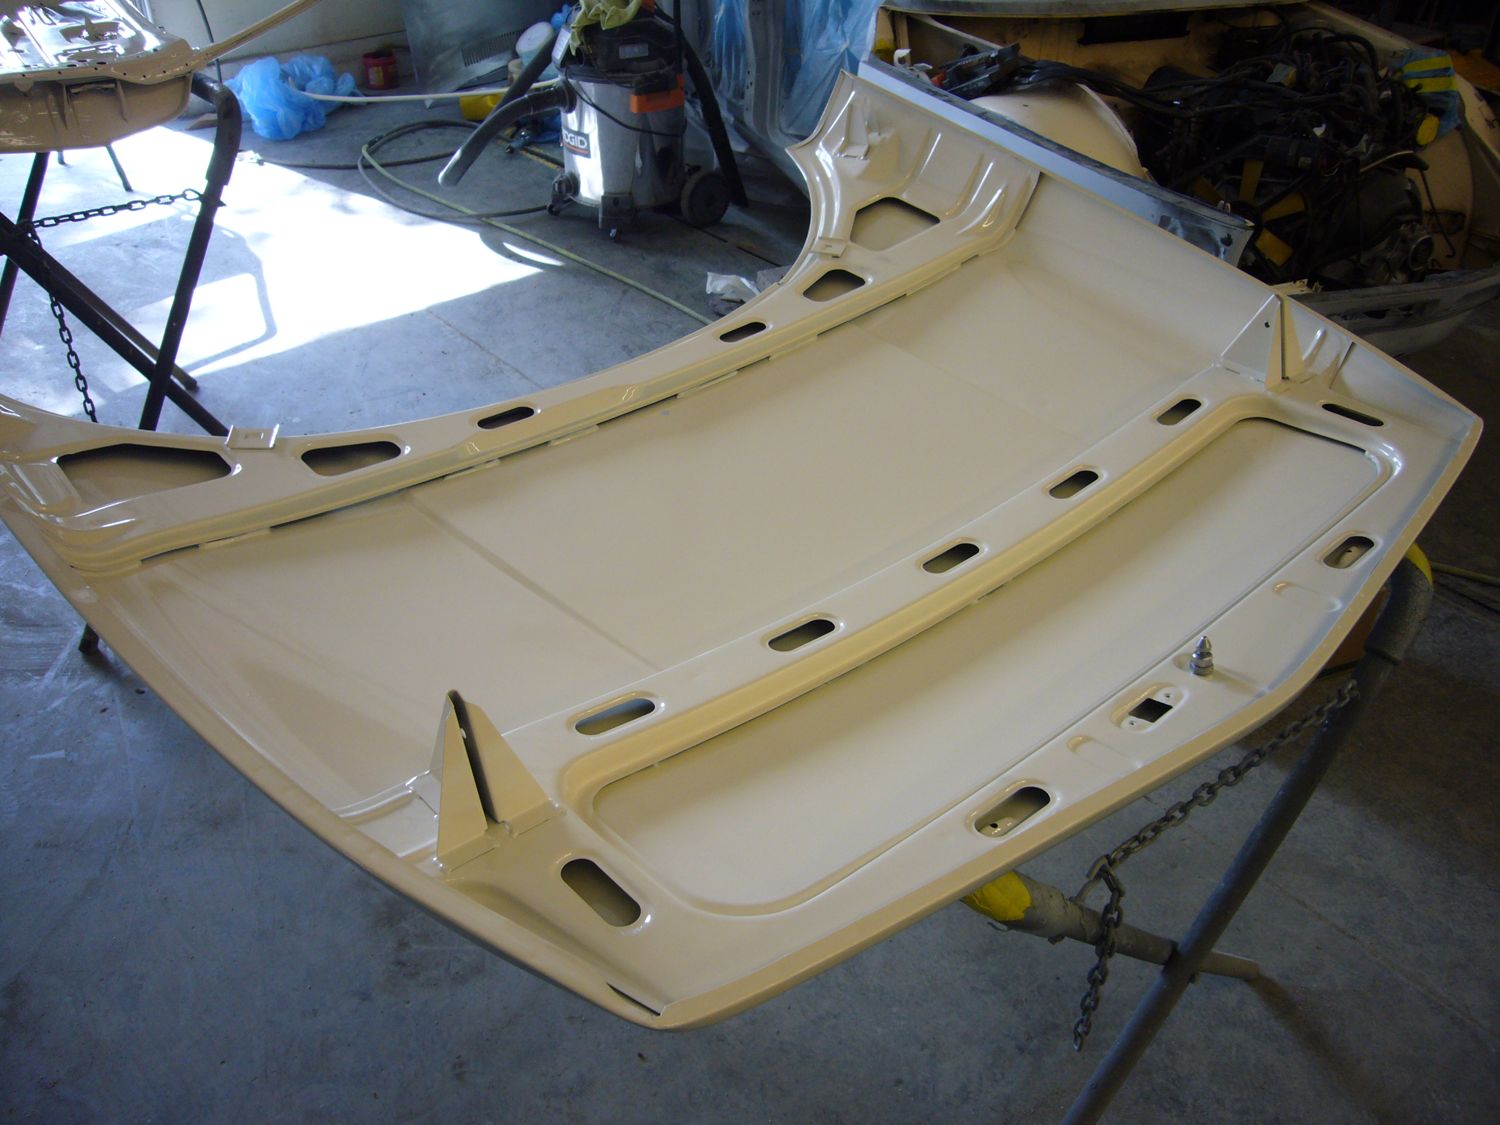
July 16, 2012
a chrome oil filler cap
I was wondering why other 99s had a fancy chrome oil filler cap.
I started looking closer at mine and picking at the paint.


The cap just had spray paint on it, so letting paint remover stand on it for a few moments loosen that up. Underneath you can see why some thought to paint it. To polish it, I used metal polishing rouge and a low RPM buffing (jeweler’s) wheel.
June 12, 2012
a first look at the new paint
SAAB WH02 (Coral White). The inside doors and hood have been painted. We double checked the fit of the hood prior to get the rest of the car painted. The very first piece I installed as an act of actually putting the car BACK TOGETHER was the hood spike for the latch.


May 22, 2012
SAABs and minis dating
Dating saabs probably isn’t has hard as dating minis. Some late model minis were imported as older model years illegally to get around licensing and DOT restrictions. One way you might be able to tell what year mini you have is to look at the back of the Lucas wiper motor. Interestingly, SAAB 99s use a similar Lucas setup. My SAAB was built in the fall of 1976 as a model year 1977 and the Lucas wiper motor shows a 1976 build as well.
(after much cleaning .. too bad its crammed up in the cowling)

May 16, 2012
hood and rear doors primed
The rear doors and hood have been corrected and primed. 3M Dyna-Glass fiberglass filler was used and sanded to smooth out the door skins and to repair areas where rust damage left holes after the media blasting. The majority of serious rust was in the lower portion of the doors where rain water tends to collect and stand. The LR door had the most damage as it was pushed in from a highway side collision, but you would never know it. The hood had some damage as well, but it was minor. There were also a number of little dents (probably from years or rocks hitting the hood) that were addressed.


April 13, 2012
1 year since the restoration was started
So here we are 1 year after the restoration began. It has been a lot of fun, but there is still quite a bit more work to do. Some parts have been replaced, some parts of been restored through easy cleaning and others through extensive cleaning. Its been a lot of cleaning! And its not just dirt, its been moss and old paint overspray as well. The rubber parts seem to be responding to scotch brite, joy and Black Again.
The rust is all gone and fortunately it doesn’t look like it made its way into any of the hidden areas. The driver’s side door had quite a bit of rust in the ‘rain collector’ but that has all been ground out and patched. It was all mostly surface rust elsewhere. The wheel wells have been power wire brushed out and a new layer of black undercoat has been sprayed in. I have a new set of SPG springs to install and Blistens for the front to replace the (apparently) stock KYBs.
I will be getting the incas sandblasted, corrected and then either powder coated or painted. I plan to put Michelin Hydroedge 195s to replace the current 185s which will match well with the new spring set.
I was hoping to be done by the 21st of this month for the Volvo/SAAB show at the Nordic Heritage Museum, but I’ll have to shoot for the Volvo/SAAB show at the Swedish Cultural Center.
More updates to come .. I’m obviously obsessed with this car.
March 7, 2012
engine compartment detail
Slowly working through the engine compartment. We’re going to pressure wash the lower portion while we have access, repair the battery tray and spray in rubber paint. The rest will be compound polished or repainted where needed. I’ll try detailing parts of the engine where I can, it won’t be pristine (that would require insanity) but it will be much cleaner. A wire brush and rubber cleaner will probably as far as I go with most parts, though I’d like to sand blast and paint what I can. It probably looks worse than it is due to the sand blasting material sticking to the oil build up on the engine.

We sand blasted and painted the valve cover. Troll Motors did a major valve job on it mid last year, not just adjusting the valves, but replacing shot buckets and shims as well. The old cork gasket was in good shape, but I went ahead and replaced it with a new one and sealant.


The radiator had its mounting brackets repaired and it was pressure tested and painted all at Greenwood Radiator. I replaced the fan switch with a new 82C unit and also replaced the thermostat with an 88C unit as well. The car used to run a little hot and the previous owner had shorted the fan switch so it was always on. I’m hoping that by having the lower threshold on the fan switch and thermostat that it will help with overheating.

February 3, 2012
new old stock radio box accessory
I found this via craigslist from a previous 99 owner who bought it from the dealer around 1978 but never installed it. There are a few variations, some including a speaker mount, some including the ash tray. Most folks want the Turbo center console which made its way into the model 900.

In the mid 70s and earlier 99s the radio was mounted in the center of the dash where the REAR DEMIST/Fasten Seat Belts panel is and the speaker was in the dash pad. In fact, you can see after I removed the dash paid there is still a perforation in the sheet metal for adding the dash speaker.

Here is what I had before:

Here is the new setup:


December 31, 2011
front seats done
Last update for the year, and quite a bit of work has been done to the car. It’s going slow, but I’m hoping that it will be done by the Spring. I did post pictures of the seats at Mark’s Upholstery, but they were still in progress. Mark asked that I get a rebuild kits so that he could fix both the seats and the backs. Now they really are as good as new. He is also recovering the head rest inserts with the same black vinyl (rather than fabric).


